
How to Read GTBUY QC Photos: A Complete Quality Check Guide
Learn how to review GTBUY QC photos before shipping. Check sizing, stitching, materials, defects, accessories, and product accuracy with this practical inspection guide.
GoGo Finder
7/15/20268 min read
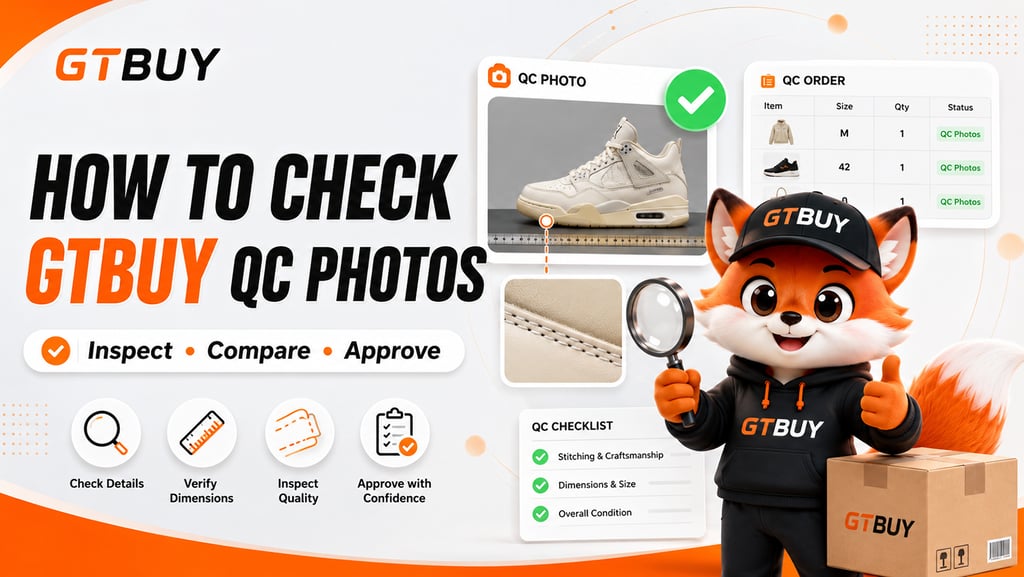
QC photos are one of the most valuable parts of the shopping-agent process.
After a seller sends your order to the GTBUY warehouse, the item can be photographed before you submit it for international shipping. These warehouse images give you an opportunity to check whether the correct product arrived and whether there are visible problems that justify a return, exchange, or additional inspection.
However, many beginners look at QC photos for only a few seconds and approve the item based on its overall appearance. That approach can miss incorrect sizes, uneven construction, damaged packaging, missing accessories, and other problems that become expensive to fix after international shipping.
This guide explains how to inspect GTBUY QC photos systematically and make a better decision before your parcel leaves the warehouse.
Quick Answer: What Should You Check in GTBUY QC Photos?
At minimum, review:
Product identity
Selected size and color
Quantity
Front and back appearance
Left-right symmetry
Stitching and construction
Visible stains, scratches, or damage
Measurements
Included accessories
Packaging condition
Differences from the seller listing
QC photos help reveal visible problems. They do not guarantee authenticity, durability, internal construction, material composition, or long-term performance.
1. Understand What QC Photos Are
QC stands for quality control or quality check.
In the shopping-agent workflow, QC photos are usually taken after the item arrives at the warehouse. They are different from the polished images shown on the seller’s marketplace page.
Seller photos
Seller photos show how the product is advertised. They may use:
Professional lighting
Edited colors
Carefully selected samples
Promotional angles
Reused factory images
Warehouse QC photos
Warehouse photos show the specific item received for your order. They are more useful for checking:
Visible condition
Correct variation
Quantity
Packaging
Measurements
Obvious defects
Use seller images to understand what you ordered. Use warehouse photos to check what actually arrived.
2. Confirm That the Correct Product Arrived
Before inspecting fine details, confirm the basics.
Check whether the warehouse item matches:
The product title
The seller’s main images
The selected model
The selected size
The selected color
The ordered quantity
A product can be well made and still be wrong for your order.
Common errors include:
The correct design in the wrong color
The correct item in the wrong size
A different version from the listing
Missing parts
One item received instead of a set
A seller substitution after stock ran out
Compare the QC photos with a screenshot of the exact variation you selected rather than relying only on memory.
3. Review Every Available Angle
Do not judge an item from one front-facing photo.
A useful standard photo set may include:
Front view
Back view
Left side
Right side
Top view
Product label
Packaging
Close-up details
Check each image separately.
Problems that are invisible from the front may appear on the back or sides, such as:
Uneven seams
Scratches
Crooked prints
Damaged corners
Loose threads
Poor heel shape
Misaligned hardware
Zoom in rather than relying on the thumbnail preview.
4. Check Product Symmetry
Symmetry is one of the fastest ways to identify visible construction problems.
For pairs and structured items, compare:
Left and right shoes
Sleeves
Pockets
Shoulder seams
Handles
Straps
Printed graphics
Logos
Panels
Ask:
Are both sides the same height?
Are the angles consistent?
Are the patterns centered?
Are the seams aligned?
Does one side look noticeably larger?
Small manufacturing variation is normal. Large differences may justify an additional photo or return request.
5. Inspect Stitching and Construction
Stitching can reveal how carefully an item was assembled.
Look for:
Loose threads
Broken stitches
Uneven spacing
Double-stitched areas that should be single
Missing stitches
Crooked seams
Fabric caught in a seam
Poorly finished edges
For clothing, pay particular attention to:
Collar
Shoulders
Sleeve attachment
Side seams
Cuffs
Hem
Pockets
For bags, inspect:
Handle attachment
Strap anchors
Zipper seams
Corners
Interior lining
Edge paint
One loose thread may be easy to trim. A structural seam problem is more serious.
6. Check Prints, Embroidery, and Graphic Placement
For printed or embroidered products, compare positioning carefully.
Inspect:
Centering
Height
Angle
Spacing
Letter shape
Thread density
Missing sections
Color consistency
A print may be clear but positioned too high, too low, or at an angle.
For embroidery, look for:
Loose threads
Uneven fill
Distorted shapes
Poor edge definition
Fabric puckering around the design
Do not judge only whether the graphic exists. Judge whether it is positioned and finished correctly.
7. Review Color With Realistic Expectations
Warehouse lighting can affect how colors appear.
Possible causes of color variation include:
Bright overhead lighting
Camera exposure
White balance
Monitor settings
Seller photo editing
Reflective materials
A slight difference between seller photos and QC images does not automatically mean the color is wrong.
Be more concerned when:
The ordered color is clearly different
Panels do not match each other
There are visible faded areas
Stains or discoloration appear
The color name on the label conflicts with the order
When color is especially important, request another photo under different lighting if that service is available.
8. Verify Clothing Measurements
Size labels alone are not enough.
A seller’s medium or large may not match the sizing used in your country. Even two products with the same label can have different measurements.
Useful clothing measurements include:
Chest width
Shoulder width
Total length
Sleeve length
Waist
Hip
Rise
Inseam
Leg opening
Compare the warehouse measurements with an item you already own.
For example, if your preferred T-shirt measures 56 cm across the chest, compare that number directly. Do not rely only on the label “XL.”
Requesting a measurement photo can prevent one of the most common shopping-agent problems: receiving an item that looks correct but does not fit.
9. Inspect Sneakers and Footwear Carefully
Footwear usually requires more detailed QC than basic clothing.
Check overall shape
Look at:
Toe-box shape
Heel height
Side profile
Sole curvature
Left-right symmetry
Check construction
Inspect:
Stitching
Glue marks
Sole alignment
Panel alignment
Material texture
Lace holes
Tongue shape
Check sizing
Confirm:
Size label
Box label
Insole length
Left and right shoe size
Seller-specific conversion information
Check condition
Look for:
Creases
Scratches
Stains
Sole separation
Misshapen areas
Damaged packaging
A small glue mark may be cosmetic. Incorrect sizing or major sole alignment problems are more significant.
10. Inspect Bags and Accessories
For bags, wallets, belts, and similar accessories, focus on both appearance and structure.
Check:
Shape
Dimensions
Stitching
Edge finishing
Hardware alignment
Zippers
Closures
Straps
Interior lining
Included accessories
Pay attention to corners and stress points. These are areas where damage or weak construction is more likely to appear.
For metal hardware, look for:
Scratches
Discoloration
Misalignment
Loose pieces
Uneven plating
A photo cannot confirm long-term durability, but it can identify obvious manufacturing problems.
11. Be More Careful With Electronics
Standard QC photos are limited for electronics.
They may confirm:
The correct model arrived
Packaging condition
Included accessories
Plug type
Visible damage
Labels and specifications
They may not confirm:
Battery health
Audio quality
Internal components
Wireless compatibility
App functionality
Long-term reliability
Before ordering electronics, verify:
Voltage
Plug type
Region compatibility
Battery restrictions
Warranty terms
Supported languages
Whether functional testing is available
A visually perfect product can still have technical problems that warehouse photos cannot reveal.
12. Check Labels, Tags, and Product Information
Labels can help verify that the item matches the order.
Review:
Size tag
Color code
Model number
Material label
Product barcode
Box label
Quantity label
Compare these details with:
Your order record
Seller listing
Selected variation
Product description
Labels can still be incorrect, but mismatched information is a reason to investigate further.
13. Confirm Included Accessories
Some products should include extra parts or packaging.
Examples include:
Detachable straps
Dust bags
Laces
Charging cables
Adapters
Replacement parts
Manuals
Cases
Gift boxes
Check the seller listing to see what is promised.
If the standard QC photos do not show the accessories, request confirmation before approving the item. Missing accessories can be difficult to recover once the parcel has shipped internationally.
14. Distinguish Minor Issues From Serious Defects
Not every small imperfection requires a return.
Usually minor
Depending on the price and product type:
A loose thread
Small packaging dent
Minor glue residue
Slight color difference caused by lighting
Small removable mark
Slightly uneven folding
Potentially serious
Wrong size or color
Large stain
Broken zipper
Missing component
Deep scratch
Major shape distortion
Incorrect model
Significant measurement difference
Structural stitching failure
Visible damage affecting use
The decision depends on:
Product price
Intended use
Return cost
Replacement delay
Whether the issue can be fixed
How visible the defect is
15. Know When to Request Additional Photos
Standard warehouse photos may not show the detail you need.
Request additional images when you need to verify:
Chest or length measurement
Insole measurement
A logo close-up
Stitching
Hardware
Product label
Electronic specifications
Damage
Accessories
Interior construction
Make the request specific.
Instead of writing:
Please take more photos.
Write:
Please provide a close-up of the right-side zipper and a measurement of the bag width.
Specific instructions produce more useful results.
16. Compare QC Photos With Recent Examples
When possible, compare your warehouse photos with recent examples of the same product.
Look for consistency in:
Shape
Materials
Print placement
Color
Stitching
Packaging
Measurements
Recent examples are usually more useful than old ones because sellers can change:
Factories
Materials
Suppliers
Production methods
Product versions
A strong older QC example does not guarantee that the current item will be identical.
17. Decide Before International Shipping
The most important rule is simple:
Resolve product problems while the item is still at the warehouse.
Once the parcel has shipped internationally:
Returns become more expensive
Seller return windows may expire
Damage responsibility becomes harder to establish
Replacement takes much longer
Shipping fees may not be recoverable
Review QC photos promptly rather than waiting until you are ready to ship the entire haul.
18. Accept, Exchange, or Return?
Use this decision framework.
Accept the item when:
The correct product arrived
Measurements are acceptable
Defects are minor
The item remains usable
Replacement would not add meaningful value
The issue matches normal manufacturing variation
Request an exchange when:
The seller sent the wrong size
The item is correct but visibly defective
Another unit may solve the problem
The seller allows exchanges
You are still within the return window
Request a return when:
The item is materially different
The wrong model arrived
Major damage is visible
Required parts are missing
Measurements are substantially incorrect
The product cannot serve its intended purpose
Return approval depends on the seller’s policy and current platform conditions.
GTBUY QC Checklist by Category
Clothing
Correct size and color
Front and back alignment
Measurements checked
Print or embroidery centered
Stitching acceptable
No stains or holes
Tags present
Sleeves and seams symmetrical
Sneakers
Correct size
Insole length checked
Left and right shoes match
Toe boxes symmetrical
Sole alignment acceptable
No major glue or stitching problems
Labels match
No serious damage
Bags
Correct dimensions
Handles and straps aligned
Hardware intact
Zippers functional
Corners undamaged
Interior included
Accessories present
Shape acceptable
Electronics
Correct model
Correct plug
Labels and specifications match
Accessories included
No visible damage
Packaging acceptable
Shipping restrictions checked
Testing limitations understood
Common GTBUY QC Mistakes
Approving too quickly
Review every image at full size.
Looking only at the front
Check all angles, labels, packaging, and details.
Ignoring measurements
Size tags are not reliable enough by themselves.
Expecting QC to prove everything
QC photos cannot guarantee internal quality or durability.
Waiting too long
Seller return windows may be limited.
Rejecting items over harmless packaging damage
Separate product defects from damage to disposable outer packaging.
Accepting a serious defect because shipping is urgent
International shipping makes later resolution much harder.
Frequently Asked Questions
What are GTBUY QC photos?
GTBUY QC photos are warehouse images taken after an ordered product arrives from the original seller. They help the buyer inspect visible condition, variation, quantity, measurements, and possible defects before international shipping.
Are GTBUY QC photos free?
The availability and number of standard or additional photos can depend on the current GTBUY service policy. Check the order or warehouse interface for the services attached to your item.
Can GTBUY QC photos confirm authenticity?
No. Warehouse photos may show labels, packaging, materials, and visible construction, but they cannot independently certify authenticity.
Can I request additional QC photos?
Shopping agents commonly offer additional-photo or measurement requests. Availability, pricing, and limits may vary, so check the current warehouse options.
What should I do if the QC photos show the wrong size?
Compare the size label and measurements with your order. If the seller sent the wrong variation, contact support promptly and request an exchange or return before the seller’s deadline.
How long should I take to review QC photos?
Review them as soon as possible. Return and exchange windows may begin when the item reaches the warehouse, and delays can reduce your options.
Do QC photos guarantee the item will fit?
No. Measurements help reduce sizing risk, but fit also depends on body shape, fabric, cut, and personal preference.
Should I return an item with minor glue marks or loose threads?
That depends on the price, visibility, intended use, and return cost. Minor cosmetic issues may be acceptable, while structural or highly visible defects deserve closer attention.
Can QC photos detect electronic problems?
Standard photos usually confirm external condition, model, labels, and included parts. Full performance testing may not be included.
Should I ship before all items have passed QC?
Review and approve each warehouse item before parcel submission. Consolidation should happen only after you are satisfied with the contents.
Final Thoughts
The GTBUY QC photo process gives buyers a valuable checkpoint between ordering and international shipping.
The most effective inspection method is:
Confirm → Compare → Measure → Inspect → Decide
Confirm that the correct item arrived. Compare it with the seller listing. Measure important dimensions. Inspect all visible details. Then decide whether to accept, exchange, return, or request additional photos.
QC images cannot remove every product risk, but careful review can prevent many avoidable mistakes before they become expensive international shipping problems.